During your Discovery interview, you’ll probe each outcome—one per sticky note—to make sure you understand it well. To do this, use the “What and Why” method described in How to probe during interviews. (Also, see the bottom of side 2 of your Discovery Interview Quick-Start Card, downloadable at www.blueprintingcenter.com > BlueTools > Conduct Discovery Interviews/Tours.) With this method, you ask questions, e.g., “How often does that happen?” and “How does this impact you?”
Then, when the customer has identified their 5-to-10 Top Picks from the interview, you’ll create Outcome Statements for each. Outcome Statements were pioneered by Tony Ulwick of Strategyn. For more on this excellent tool, see his book, What Customers Want.
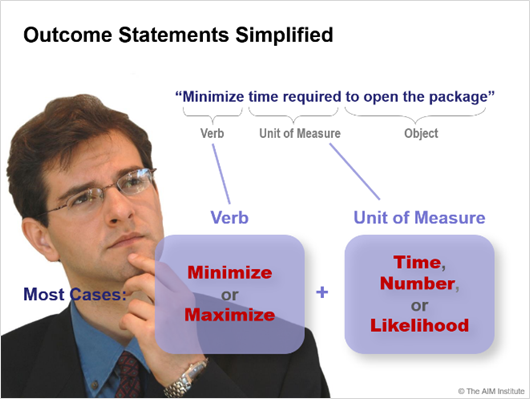
An Outcome Statement takes this form: Verb – Unit of Measure – Object. Example: “Minimize time required to open the package." In our work, we’ve found the verb can almost always be “minimize” or “maximize.”
Other verbs, such as “prevent” or “ensure” are also fine. But when you’re creating outcome statements under the direction of the customer, it helps to see if there is something to minimize or maximize. You’ll also find that the unit of measure can be time, number or likelihood in many cases.
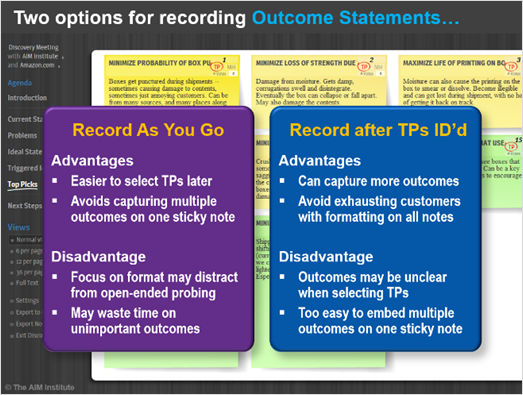
There are two approaches you can use to record Outcome Statements:
- Record as you go: In this case, you try to create an outcome statement every time you have an outcome on a sticky note. This approach has its advantages: It's easier to quickly understand and select TPs later, you avoid capturing multiple outcomes on a single sticky note, and you can work with ideas while they are "fresh." But it has one rather significant disadvantage: You can waste a lot of time creating Outcome Statements on an outcome that wasn’t that important to the customer.
- Record after Top Picks are identified: This is our preferred approach. Near the end of the interview—about 20 minutes before you need to finish—ask the customer for their 5-to-10 Top Picks. Then click “Top Picks” in the left-side panel and try to create an Outcome Statement for each sticky note. With this approach you have more time to capture many outcomes, you don't exhaust customers by formatting Outcome Statements on every note, and it's less pressure for your interview team.
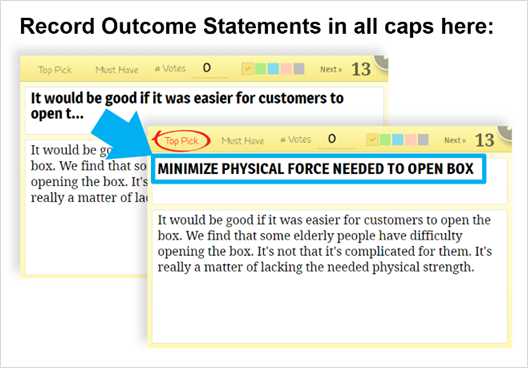
Record your Outcome Statement in the header (top box) of the sticky note. You’ll see that this space is initially filled with the beginning of the lower note: That’s so the note can still be read if viewing in the 36-note-per-page view. But once you start typing in this header, everything will be capitalized. This is done so you can quickly tell which sticky notes have completed Outcome Statements.
Check out the next BlueHelp article, Optimizing your Outcome Statements for best-practice rules... and to clarify "fuzzy outcomes." For more on Outcome Statements, see e-Learning Module 16: Capturing Customer Outcomes at www.blueprintingcenter.com > e-Learning. This is a critical skill for product managers and other champions of marketing, innovation, and new product development.
Keywords: customer outcomes, outcome statement, minimize, maximize, record as you go, TP, Top Pick, record after Top Picks identified, sticky note header, sticky note top box