Once you’ve finished reviewing your Discovery interviews and cleaned up TPs, MHs, and outcome statements (last BlueHelp article, Review your Discovery interviews)…you’re ready to prepare your Must Haves for Preference interviews.
Go to www.blueprintingcenter.com > Blueprinter software > Tool 3.1: Prepare Must Haves, and you’ll see all your Must Haves (assuming you have some) in the “Staging Area” on the left. Drag these MH sticky notes one by one onto the Sorting Board in the center of the screen.
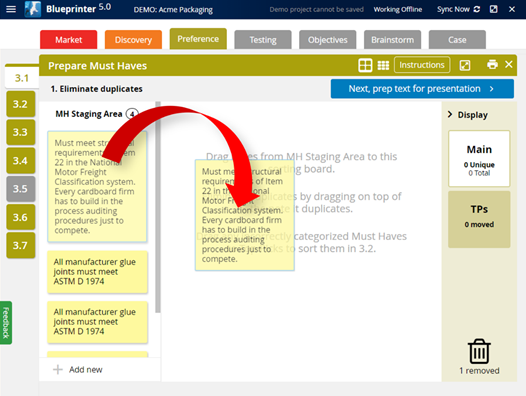
Next, look for duplicates: It’s quite common to hear the same Must Have at more than one interview. If you find duplicates, just drag one of the sticky notes onto the other sticky note. You’ll see you can either drag a note to the top or bottom of the destination sticky note pile. It’s a good idea to put the sticky that “says it best” on top. Otherwise, send it to the bottom of the pile (see red arrow below).
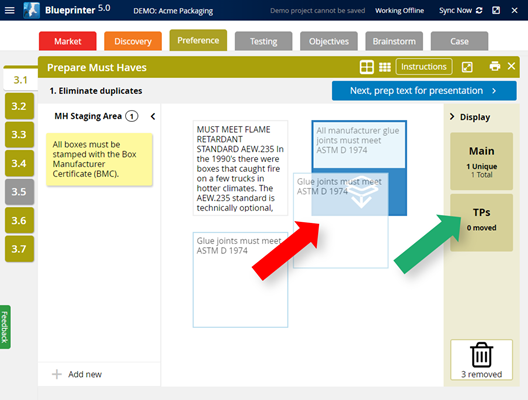
What if you now realize that an outcome marked Must Have really should have been marked as a Top Pick? This is very common--much more common that marking something a TP that should have been a MH. Remember: A Must Have is necessary and sufficient. That is, customers cannot use your product without this outcome (it's necessary) AND they don't want any improvement in this outcome (it's sufficient).
No problem if this happens: Just drag the sticky note to the “TPs” box on the right side (green arrow above). This sticky note will then be included with the other TPs in Tool 3.2: Prepare Top Picks.
Here are some more tips:
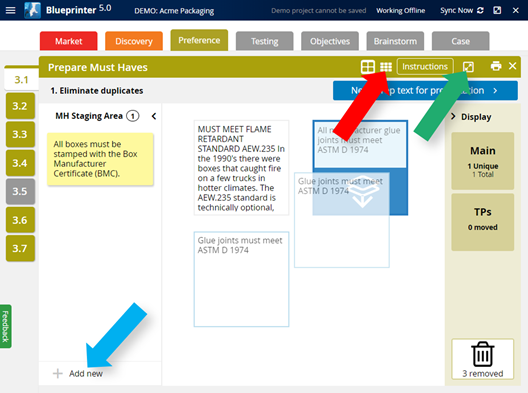
- If you need to add another MH for any reason, you can click “+ Add New” at the bottom of the staging area (blue arrow below).
- If you need more space to work, click the “small notes” button in the toolbar (red arrow below).
- You can also create more space by clicking the expander button in the toolbar (green arrow below).
Once you’ve eliminated all MH duplicates, click the blue button in the upper-right: “Next, prep text for presentation” and you’ll see the screen below. Notice that all the text from the original sticky note is displayed for each MH. That’s too much. You’ll show these Must Haves to customers during Preference interviews… so take some time now to eliminate unnecessary text so you’re left with a clear, succinct Must Have.
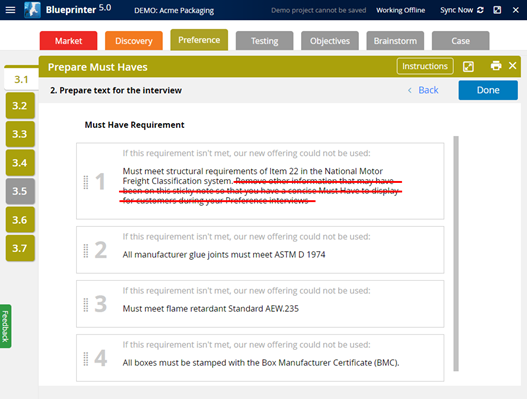
IMPORTANT: When you’re done editing your Must Haves, be sure to click the blue “Done” button in the upper right. If you skip this step, you’ll get a warning later that sends you back to do this.
For more on this topic, see e-Learning Module 23: Preference Interviews A, at www.blueprintingcenter.com > e-Learning.
Keywords: Prepare for Preference interviews, Blueprinter Tool 3.1 Prepare Must Haves, MH, Must Haves, MH staging area, drag MH notes onto sorting board, eliminate duplicate Must Haves