Once you’ve prepared your Must Haves for Preference interviews (last article), it’s time to prepare your Top Picks. This process is similar to Must Haves, but is more involved. Go to www.blueprintingcenter.com > Blueprinter software > Tool 3.2: Prepare Top Picks. You’ll see all your Top Picks in the Staging Area on the left.
If you see an Alert when you open Tool 3.2 ("You haven't finished preparing Must Haves yet"), click through the screens in Blueprinter Tool 3.1 and be sure to click the blue "Done" button at the end.
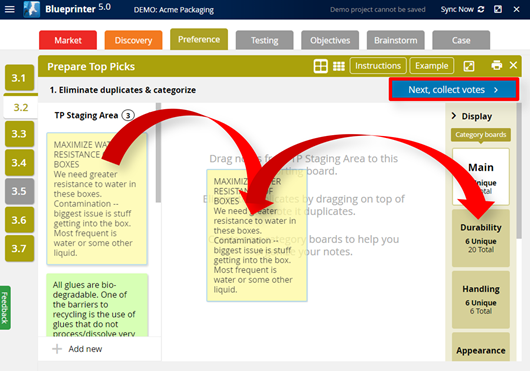
As you did with MHs, drag these TP sticky notes one by one onto the Sorting Board in the center of the screen. And as with MHs, your job is to eliminate duplicates by stacking one TP sticky note on another that matches it.
But here’s what’s different with TPs: Most teams find they don’t have enough room on the Sorting Board for this work. If this is true for your team, you can create “Category Boards” on the left… into which you can deposit your Top Pick sticky notes. If your Top Picks were all about corrugated packaging boxes, you might create Category Boards for box Durability, Handling, Appearance, etc.
Now you can drag TPs from the left-side Staging Area onto either the Sorting Board or directly into a Category Board (see below.)
When you’ve emptied the Staging Area, click each Category Board and look for duplicates within it. Eliminate them by stacking one note on another. If you want to go back to the Sorting Board, click “Main” Board just above the Category Boards.
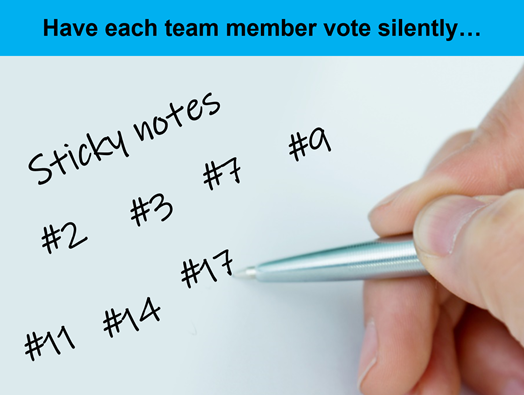
When you’ve eliminated all duplicates, click the upper-right blue button, “Next, Collect Votes.” Notice that those notes with the most duplicates in their stack are shown at the top. Now its time for some old-fashioned “pen and paper” work: Ask each team member to silently write down the numbers of seven Top Picks they think should be included in Preference interviews.
Here’s why this is an important step: Imagine you skipped this individual voting and tried to do this as a group… and one person said, “Well clearly we need to include note #8.” Everyone else on the team thinks to themselves… “Really?!” Now the team must expend considerable energy to avoid note #8. Better to vote individually and let this person try to convince team-mates that note #8 is justified.
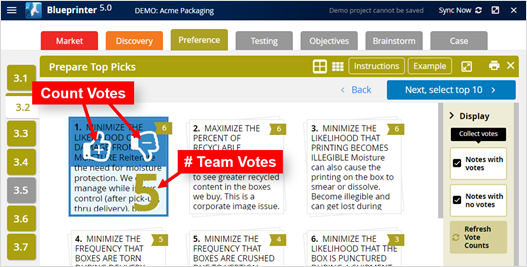
Next ask team members to raise their hands if they voted for note #1, then note #2, and so on. The note-take can click a “thumbs-up” or “thumbs-down” icon to record the total number of votes for each Top Pick.
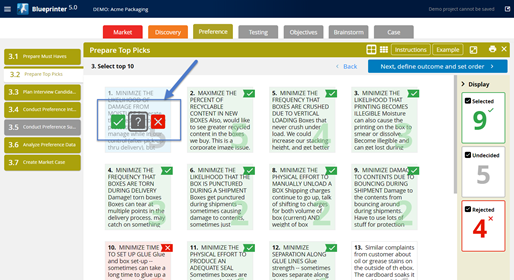
When you’ve finished tallying all the team votes, click the upper-right blue button: “Next, select top 10.” On the next screen, you’ll see the Top Picks that received the most votes at the top. For each screen your team then makes the following selections (see blue arrow below):
- Green check-mark: This outcome will be one of the 10 used in Preference interviews.
- Red “x”: This outcome will not be one of the 10 used in Preference interviews.
- Grey “?”: We’re not sure yet if this outcome will be used in Preference interviews.
On the right side of the screen, the software will keep track of how many you’ve selected for each category… and will warn you if you exceed 10.
When you’ve finalized your 10 outcomes, click the upper-right blue button, “Next define outcome and set order.”
You’re almost done! You just have three tasks left:
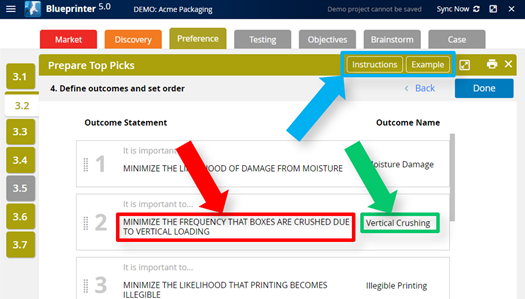
- Edit your outcome statements: Check each of your outcome statements (red arrow below) to ensure they conform to the instructions and examples provided in the toolbar (blue arrow below).
- Add outcome names: For each outcome statement, add an outcome name… which can have no more than 20 characters. Try to create names that will help your charts and graphs briefly describe each outcome… because that’s how these names will be used later.
- Click “Done”: When you’ve added the last outcome name, the blue “Done” button in the upper-right will become active. Make sure you click this… or you’ll get a warning later in the process.
For more on this topic, see e-Learning Module 23: Preference Interviews A, at www.blueprintingcenter.com > e-Learning.
Keywords: Prepare for Preference interviews, Blueprinter Tool 3.2 Prepare Top Picks, TP, Top Picks, TP staging area, drag TP notes onto Sorting Board, eliminate duplicate Top Picks, Category Board, silently vote for TPs, define outcome and set order