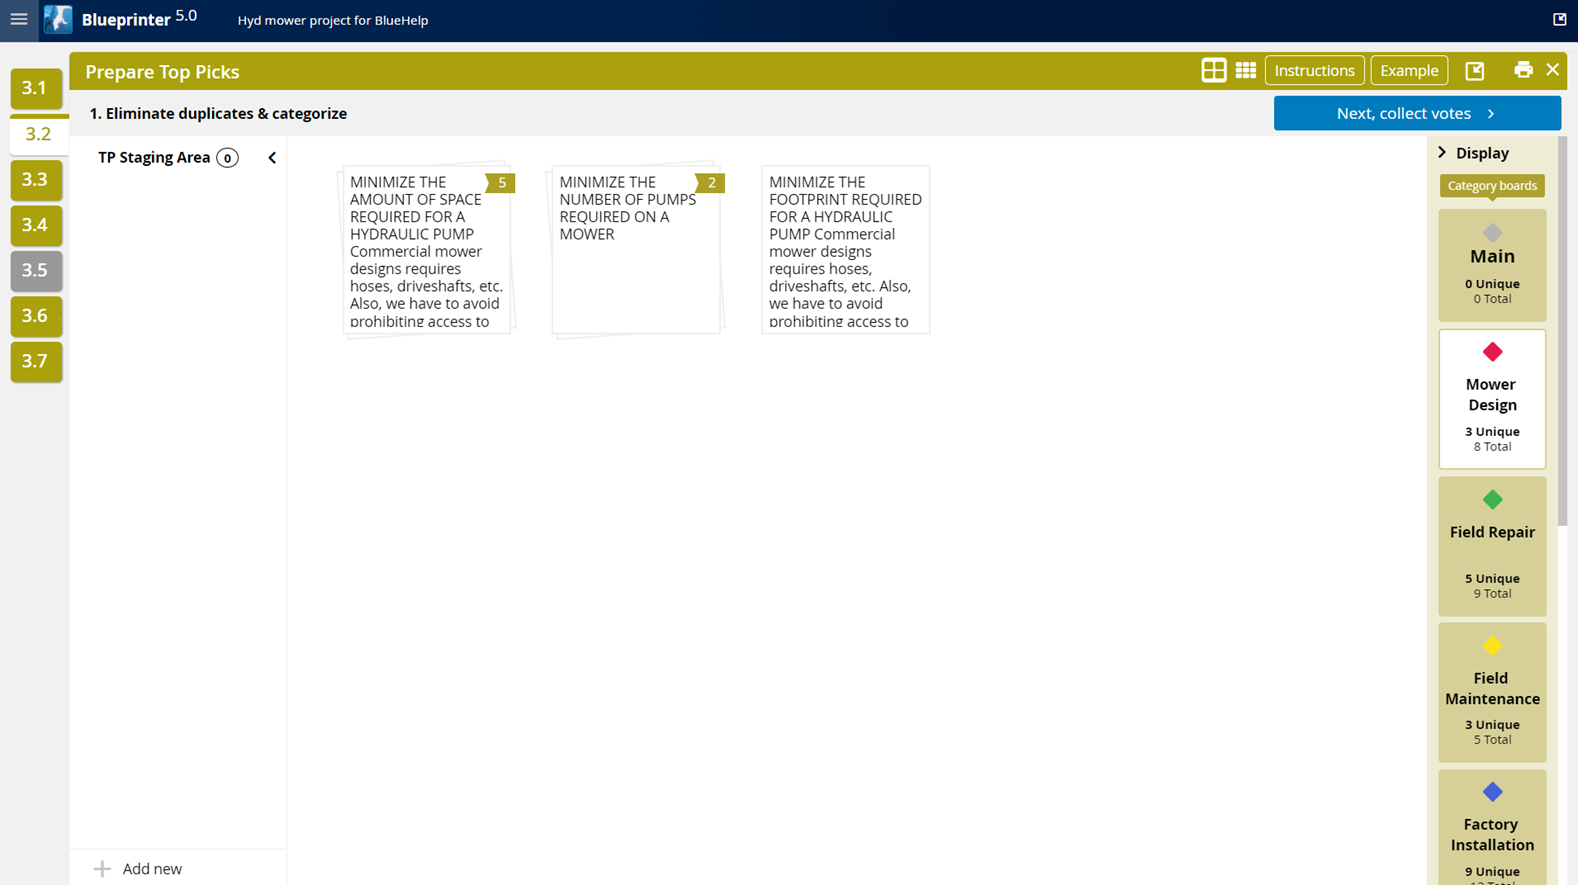
Tool 3.2 helps you to process all the Top Pick outcomes from across all your Discovery Interviews.
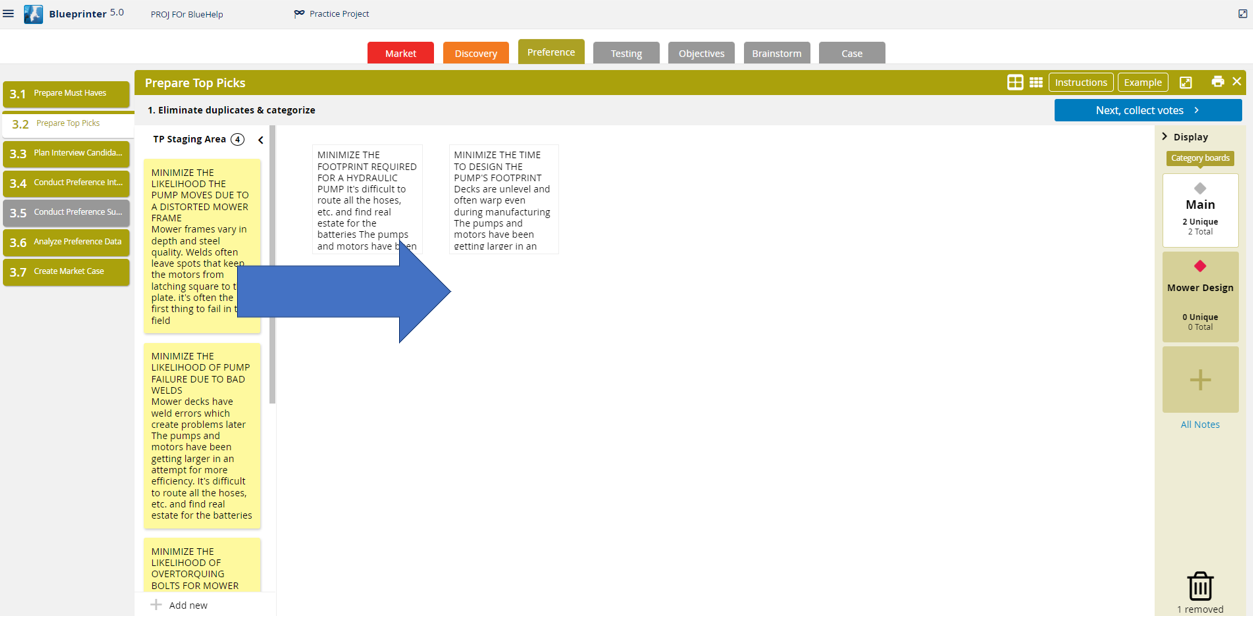
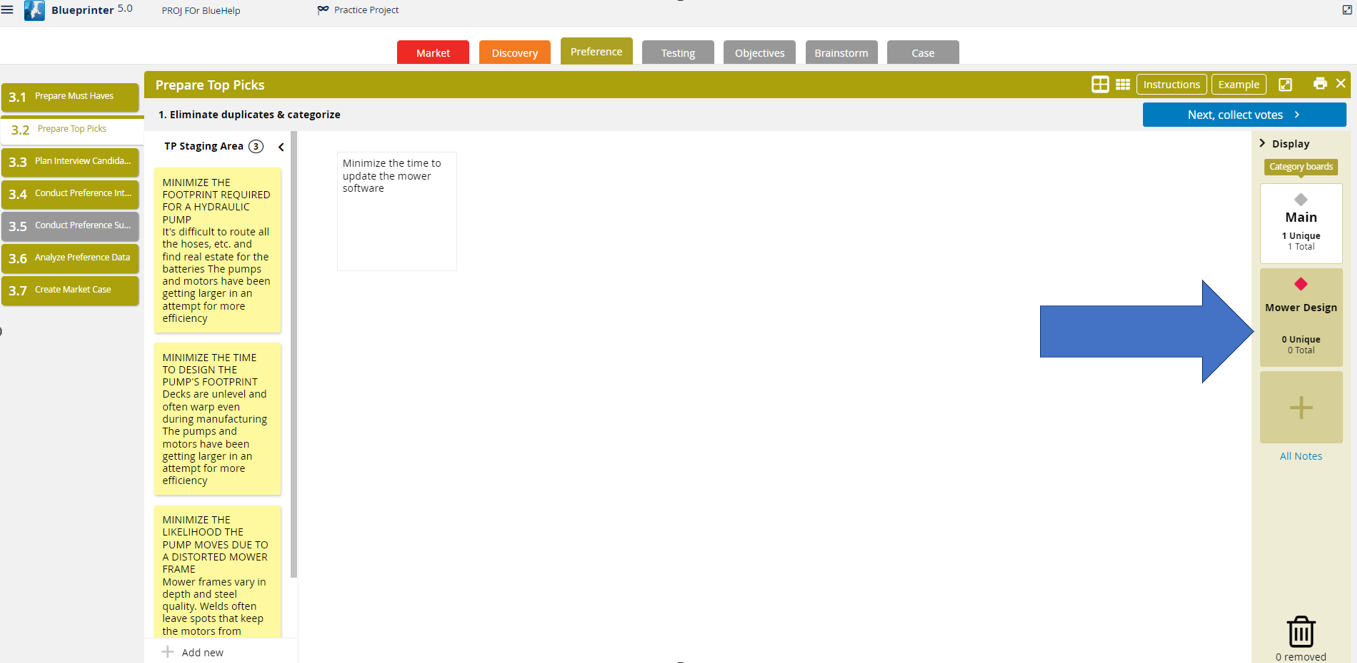
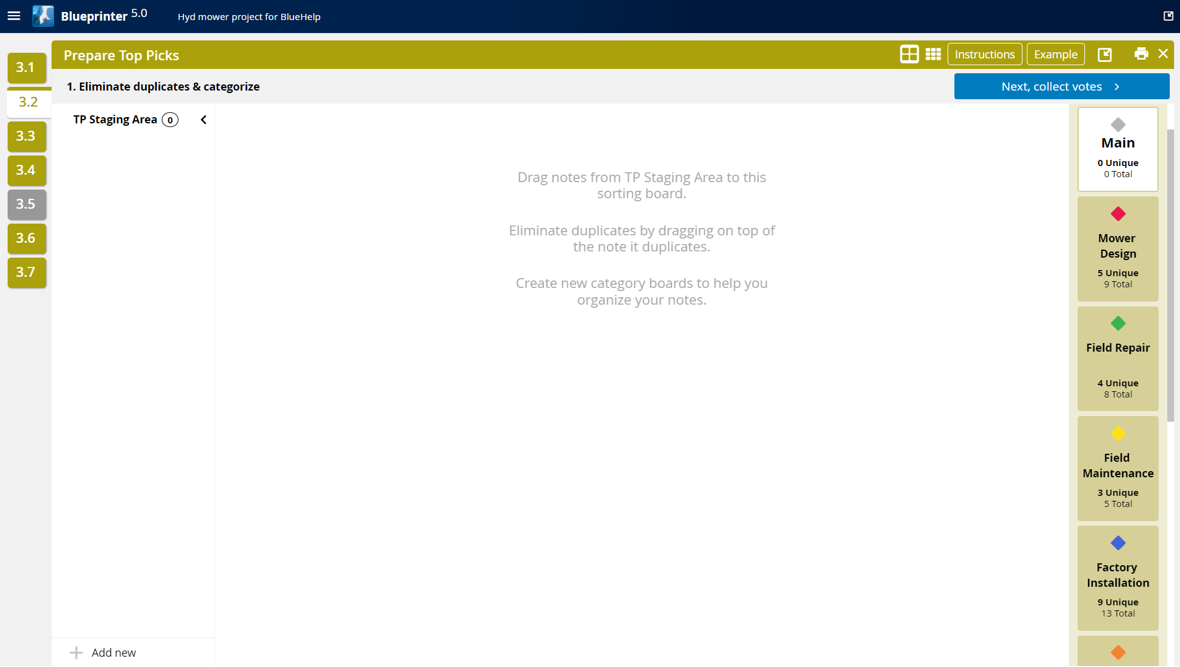
Beginning in Tool 3.2, your outcomes will be loaded in the "TP Staging Area," on the left side of the image below.

Step 1: Drag the outcomes to the sorting board for sorting.
Step 2: Create category boards to organize the outcomes. Just drag the outcomes into each board for sorting.
Colors will be assigned to each category as they are created.
Step 3: Select a Category to see the outcomes within, such as "Mower Design" below.
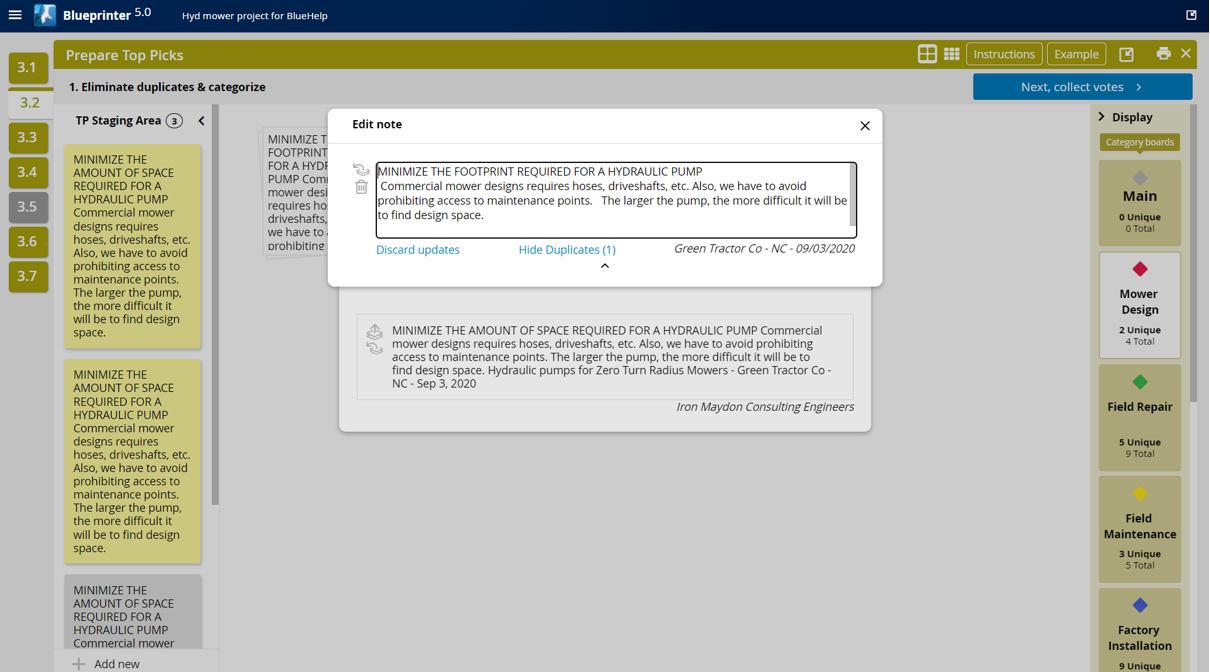
Step 4: Find outcomes that are redundant, or essentially duplicates. Drag one duplicate onto the other duplicate. It's like stacking cards in a pile. Put the new card either at the top or the bottom of the card by hovering one over the other. Afterward, notice the number on each stack of cards, it reveals how many are in the stack.
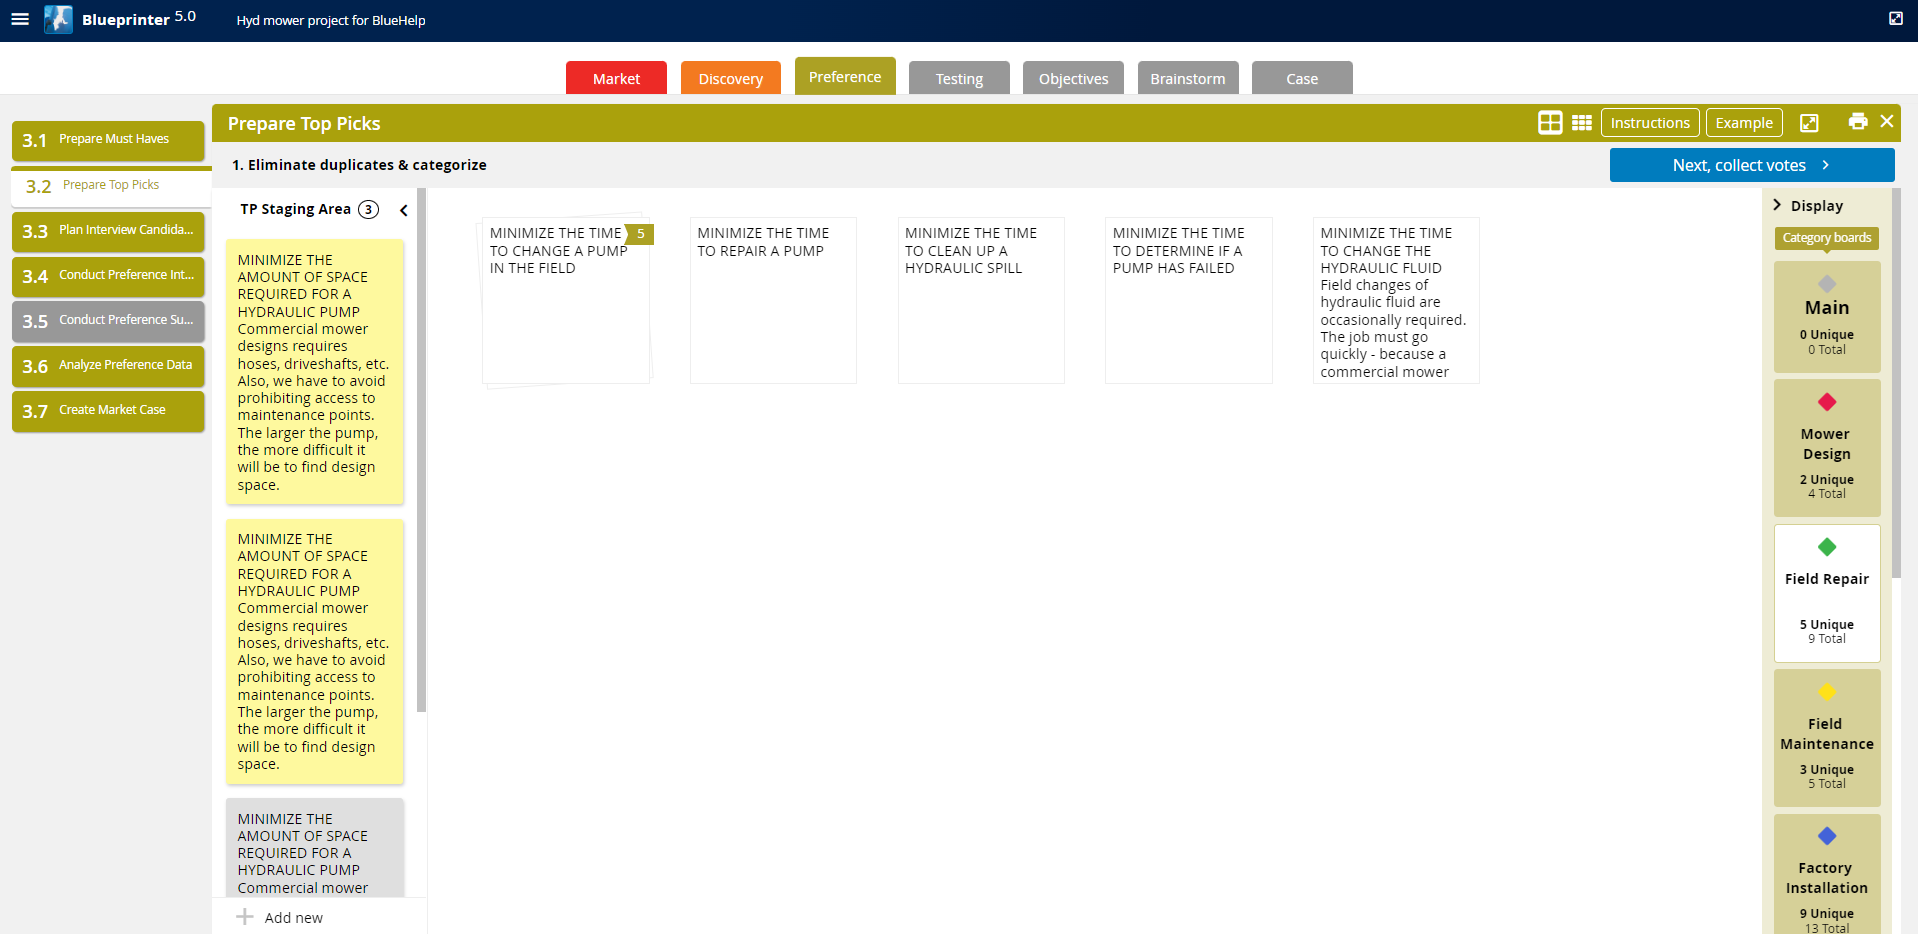
Step 5: To see the cards beneath, just select the stack of cards, and you can see what's beneath. Use the arrows to upgrade a lower card to the top, or to return it to the TP Staging Area.
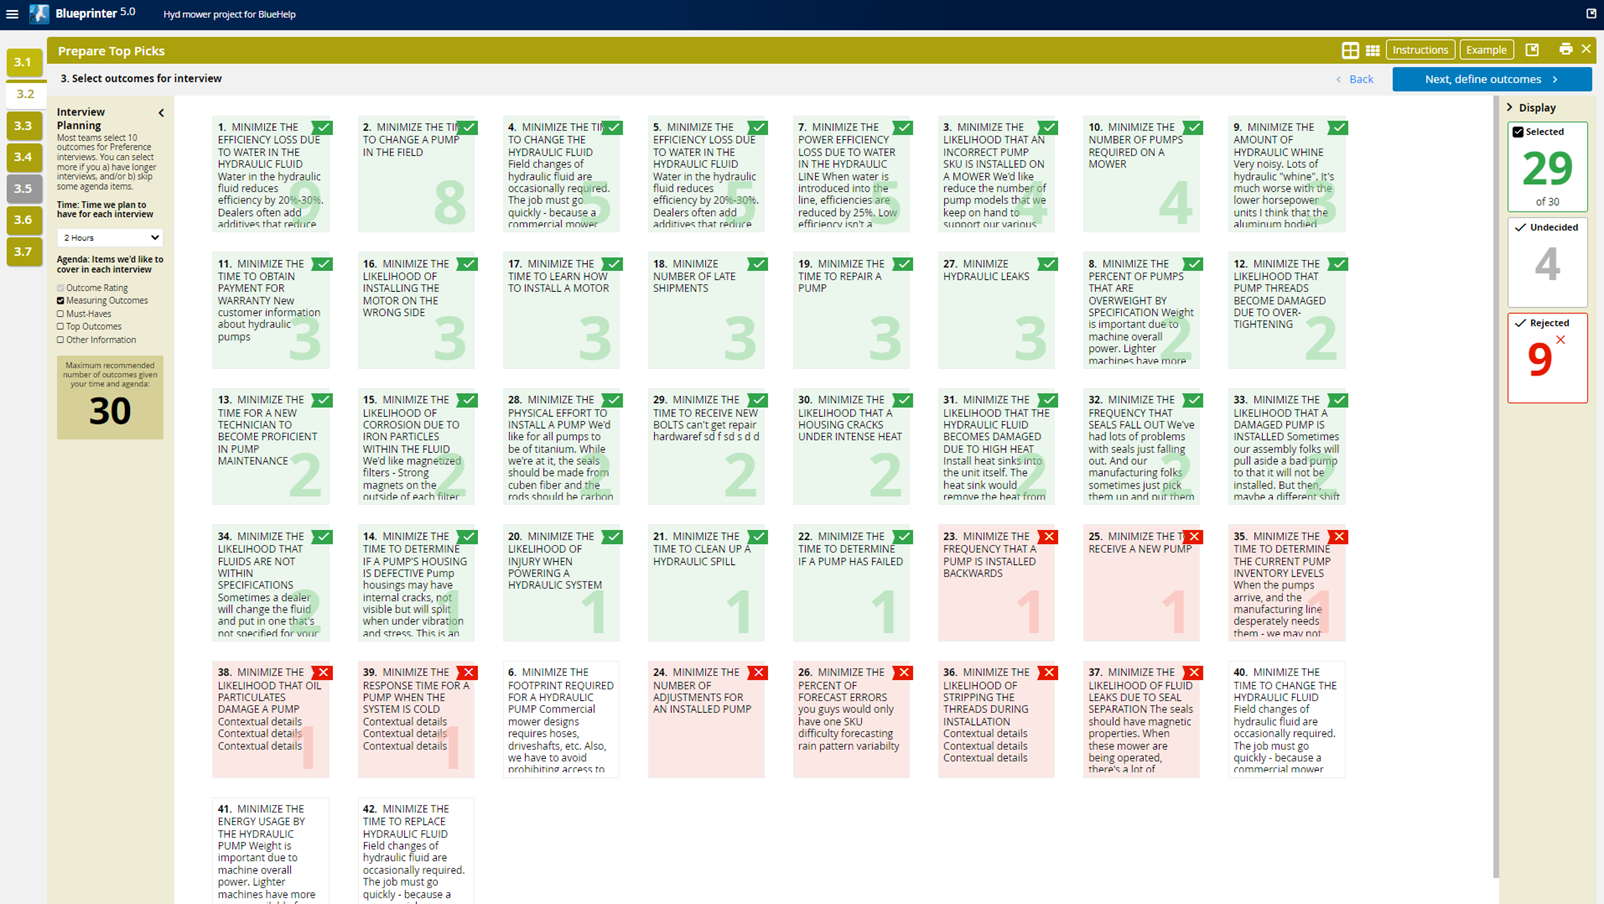
Step 6: Now, with outcomes organized into categories, and duplicates removed. We'll proceed to narrow the list to the smaller group that will be used for Preference Research. It's common to vote with the team as part of this process within the "Collect Votes" step.
For the voting process, estimate how many outcomes you anticipate ending up with. Each team member gets a vote for about 50% of that estimate. So, if you estimate 10 outcomes, each person gets five votes. To tally the votes, click on the stack of cards with the up arrow.
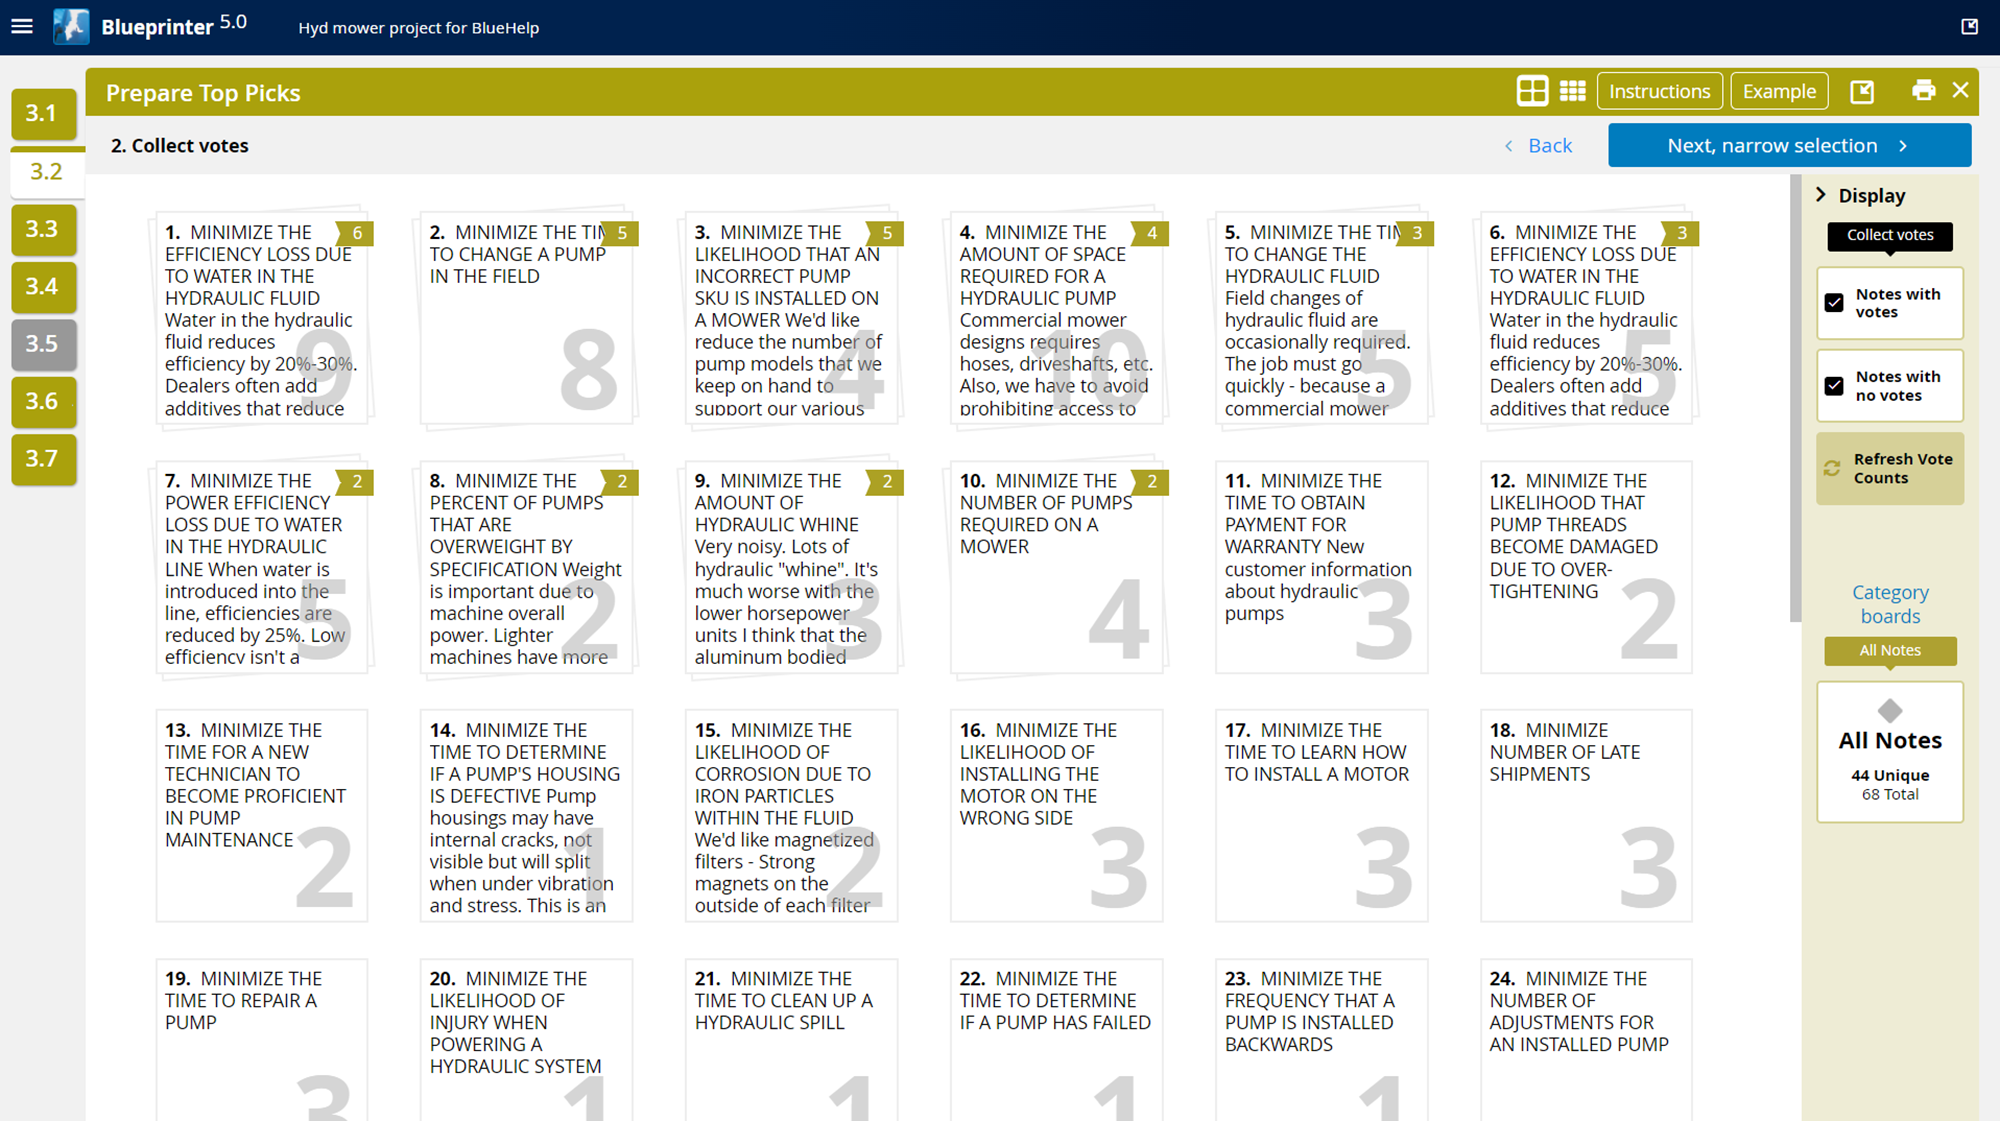
Step 7: After voting is complete, select "Next, narrow selection." The number of votes will appear on each stack. Use the Interview Planning calculator on the left side to plan the number of outcomes that will be prioritized. The limiting factors are the amount of time available and the number of sections that you'll cover in a Preference Interview.
(If not doing Preference Interviews, but rather using a survey, then you can use up to 90. However, even if using a survey, you want to keep the number of outcomes managable to keep the survey from getting too long. For most projects, you'd want to keep this number under 50.)
Select the outcomes to be included by hovering over the card, and either selecting the green check (on the left) to include, the red "X" (on the right) to exclude, or the gray "?" in the middle if undecided.
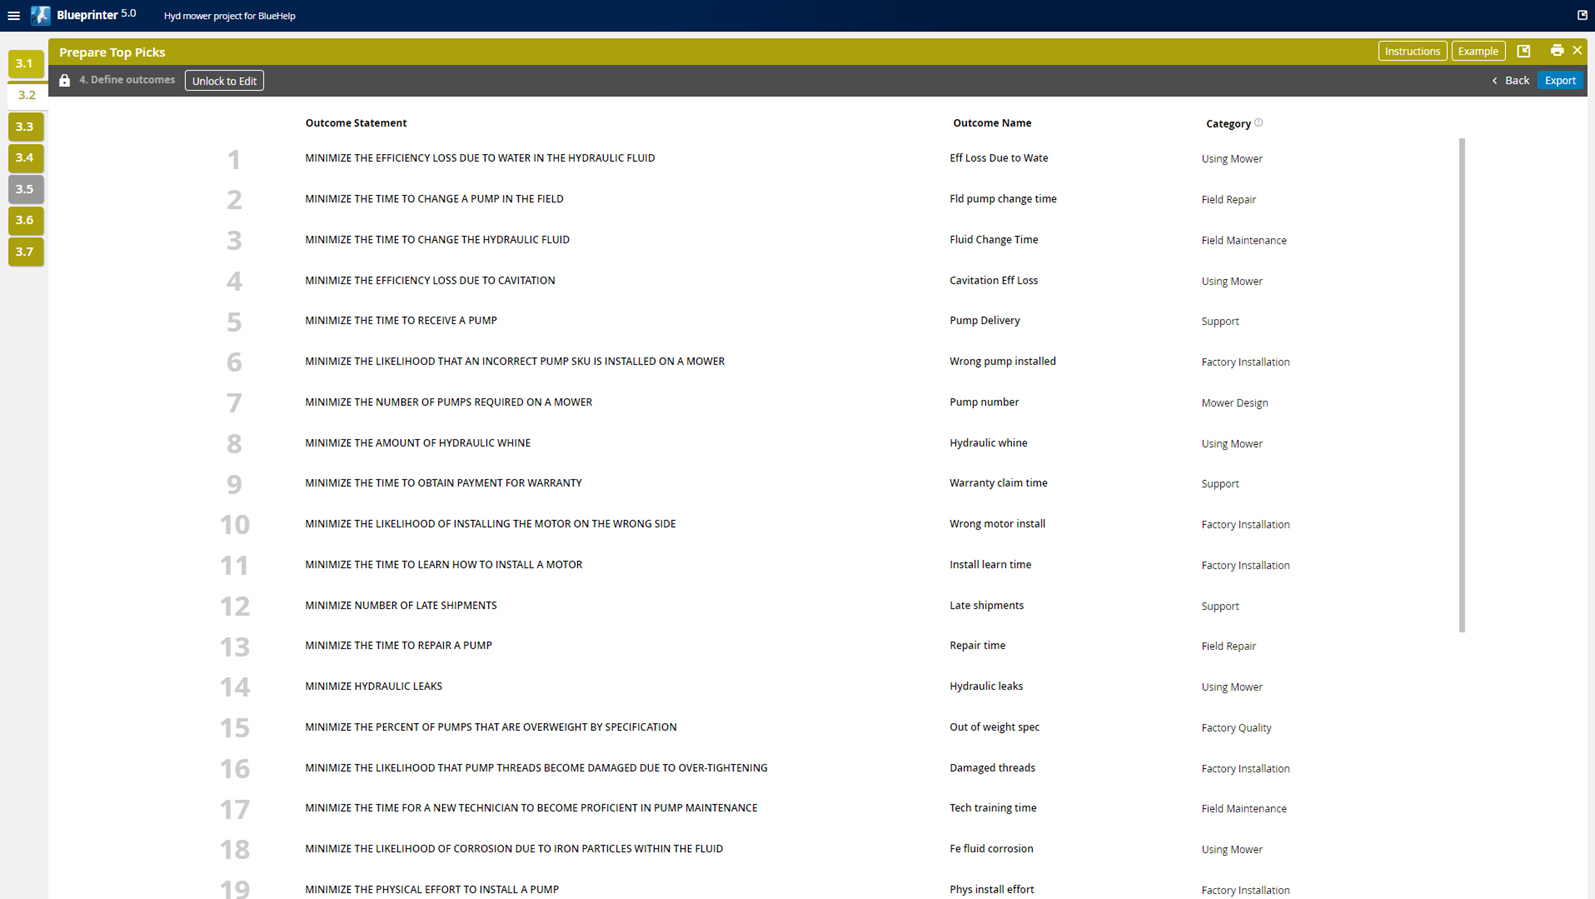
Step 8: Advance to the right with "Next, define outcomes" after finished with the selection.
For each outcome, eliminate extra text and refine the outcome statement if needed. You'll see each outcome is categorized. You can change the category at this point if desired.
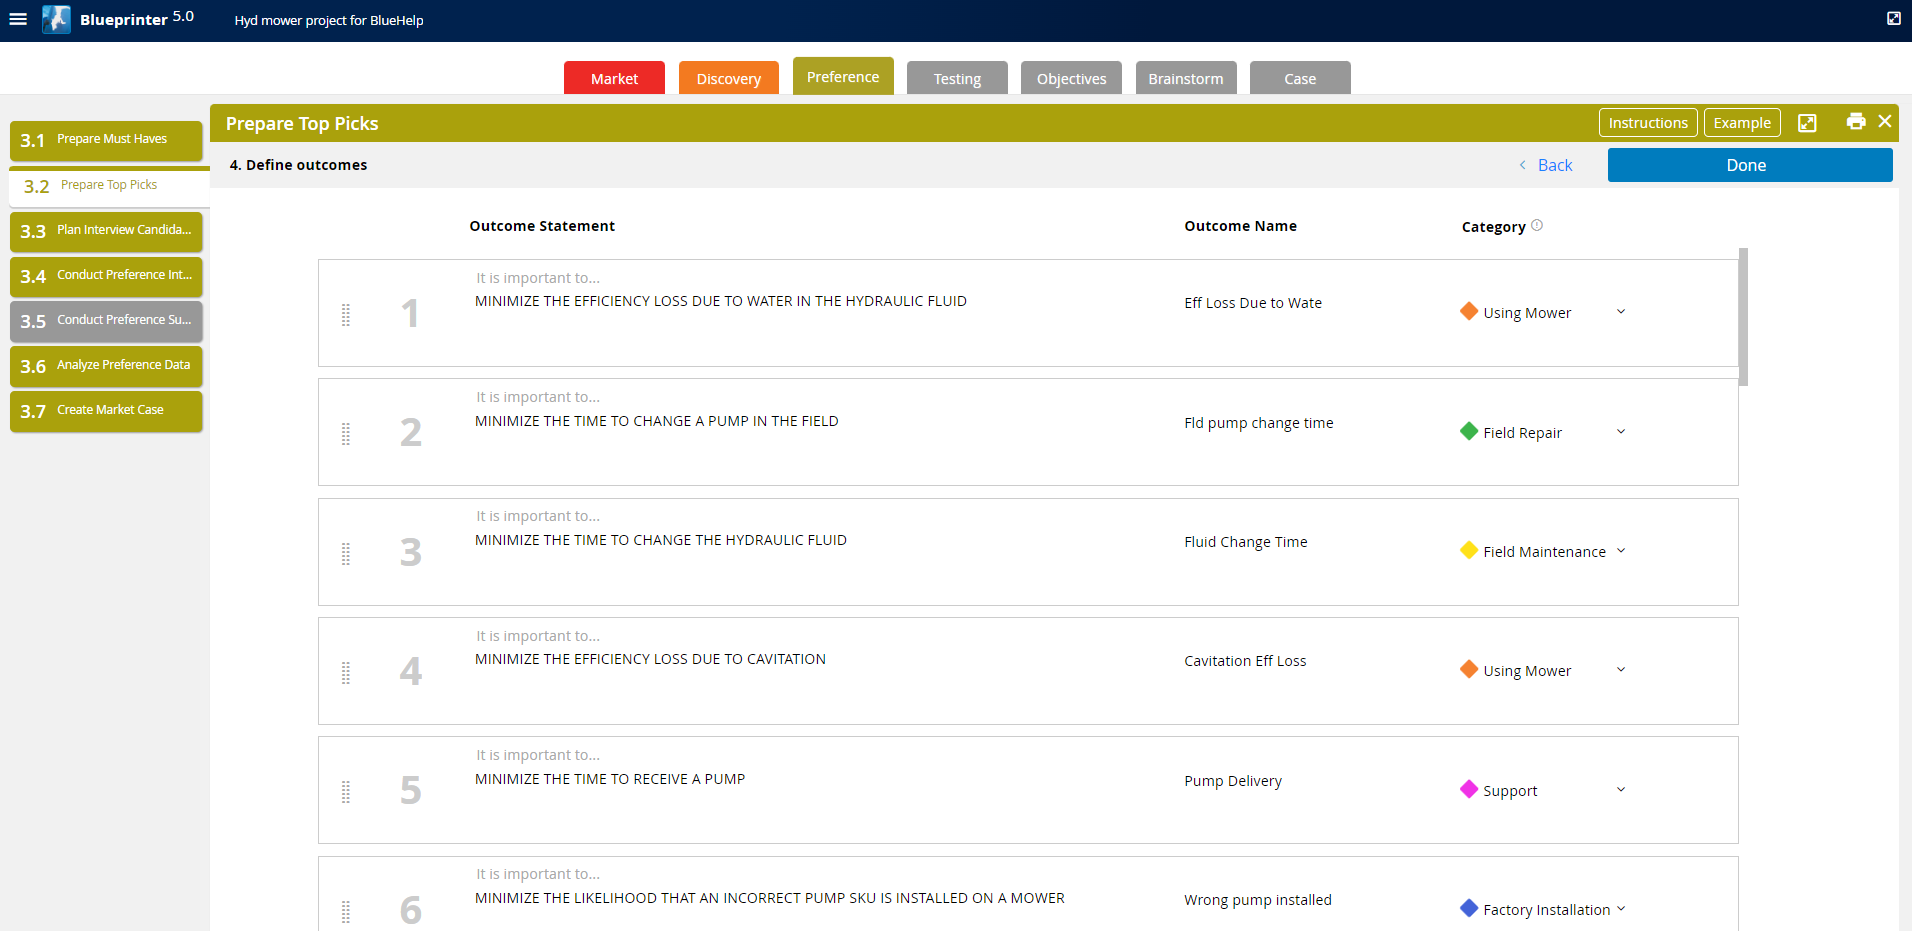
Step 9: Select "Done" when finished. You're now ready for Preference Research!