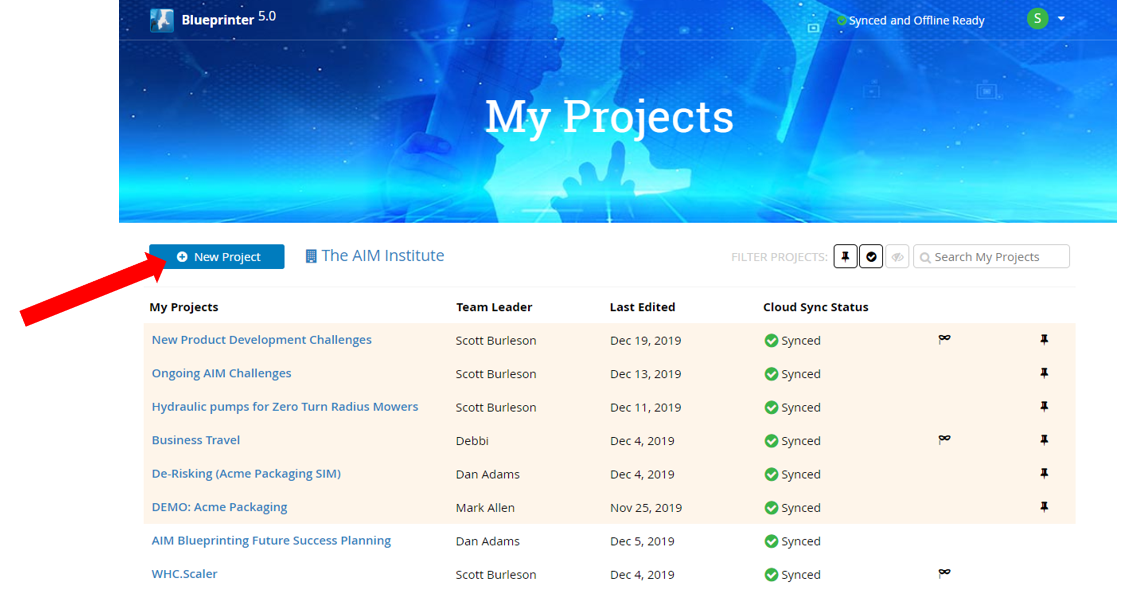
1. After opening Blueprinter® software from www.blueprintingcenter.com, go to the "My Projects" screen. Select "+ New Project".
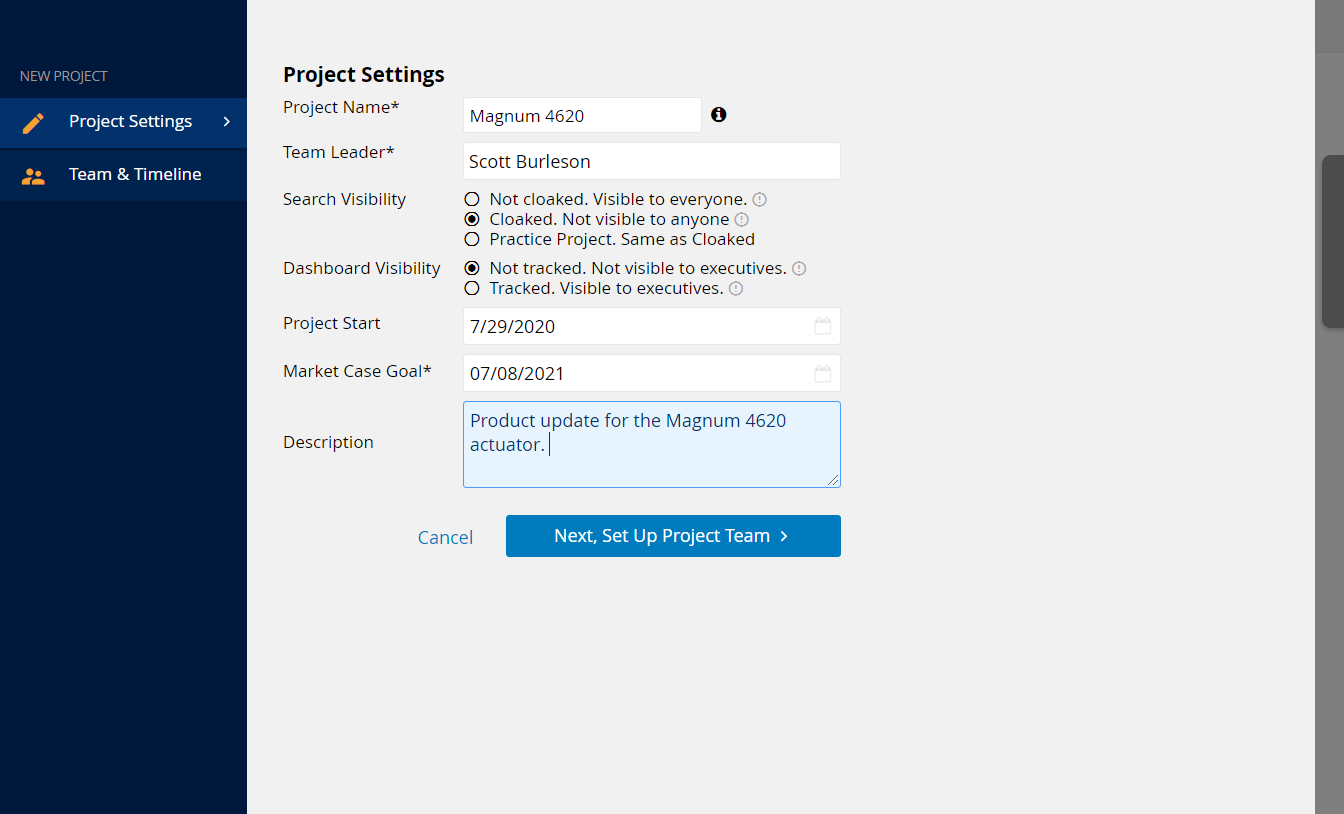
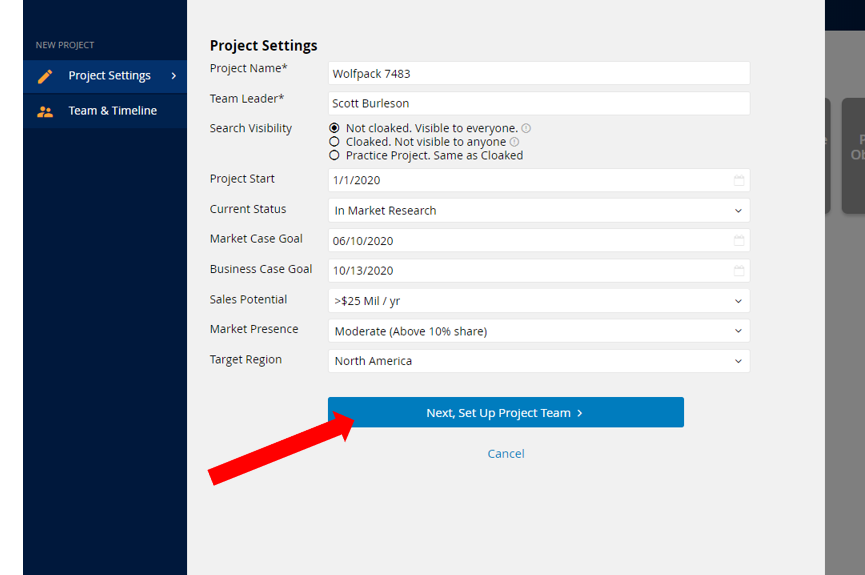
2. Give the project a name. Don't worry too much about this, you can change the name later if you choose. However, the name cannot be longer than 30 characters. The length is restricted to improve the appearance of executive reports.
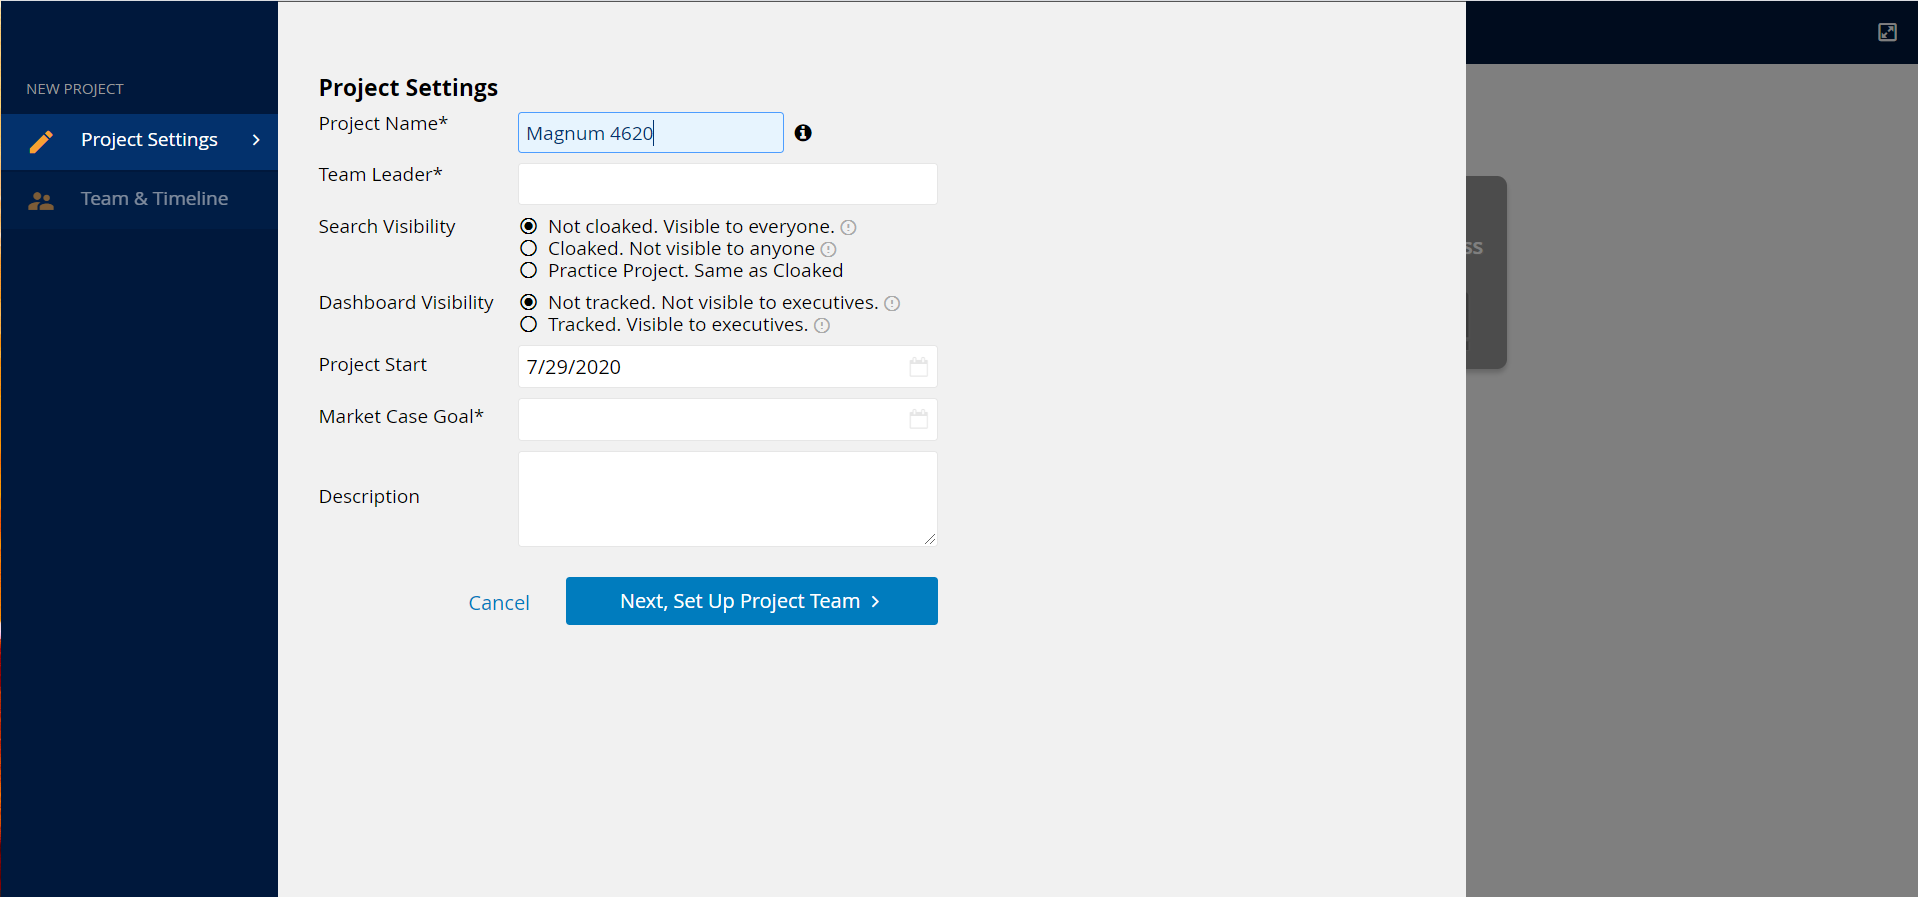
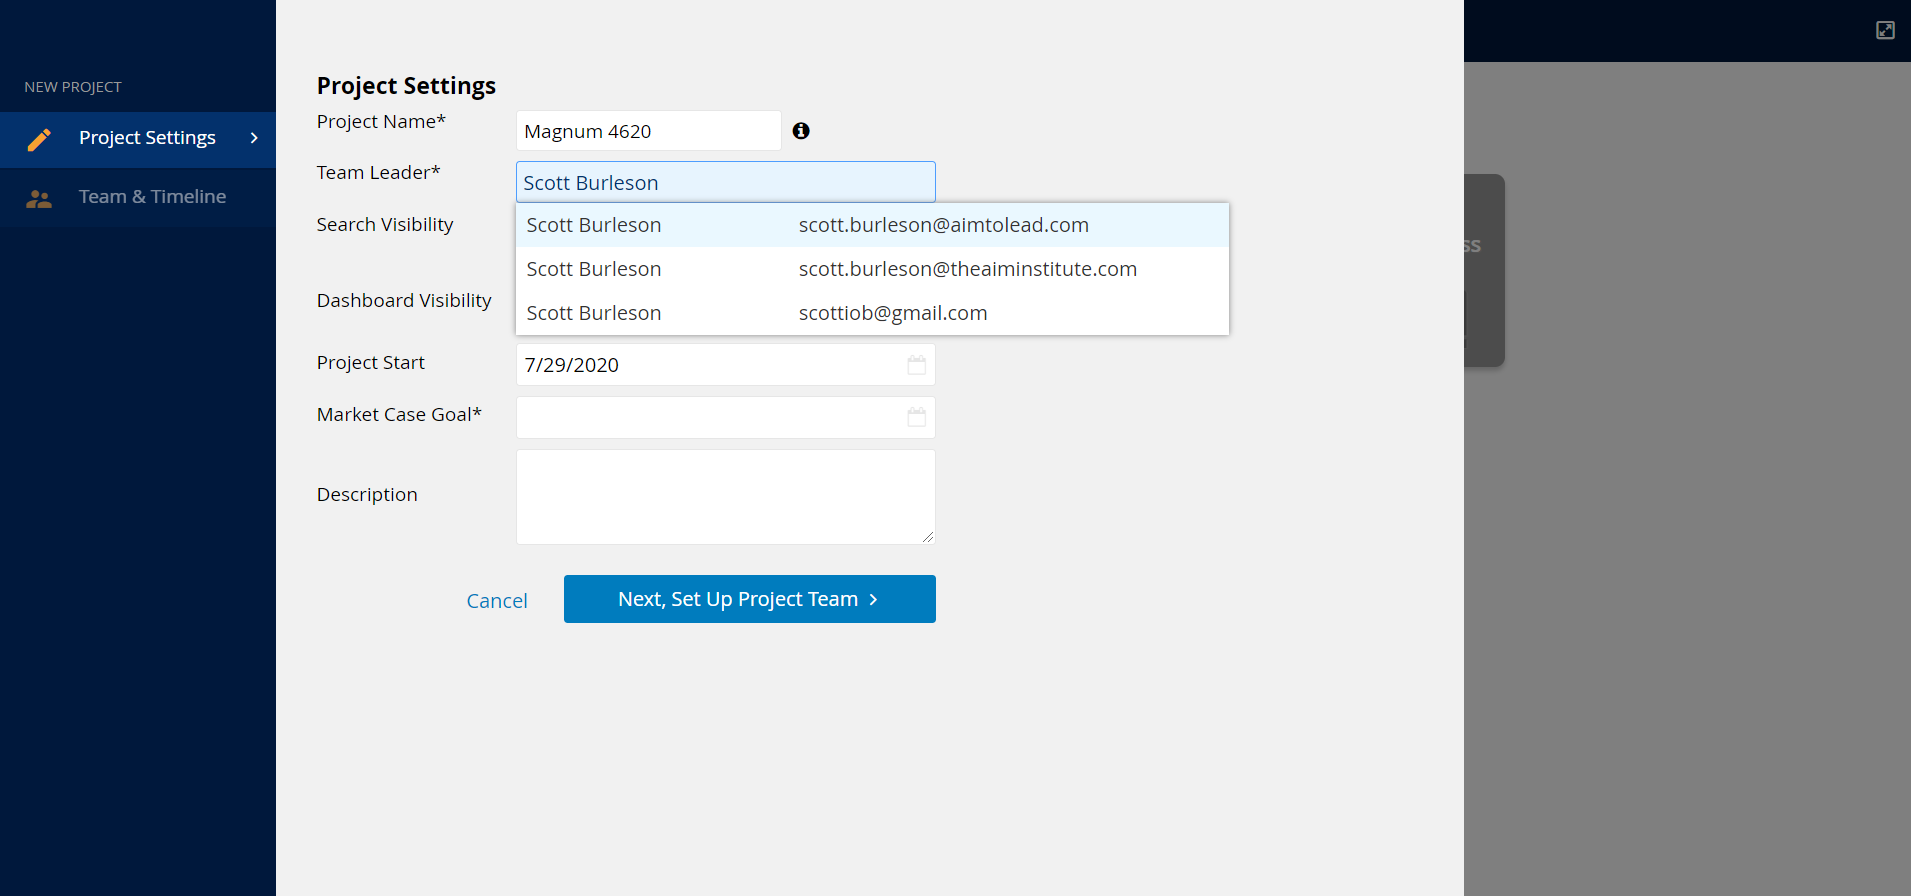
3. Assign a Team Leader. The team leader must have a Blueprinter software subscription. You can begin typing to see what names come up, or scroll through the list of your company's subscribers.
4. Set the Market Case Goal. The Market Case is the result of your qualitative Discovery Interviews, your quantitative Preference Interviews, along with your analysis and summary comments.

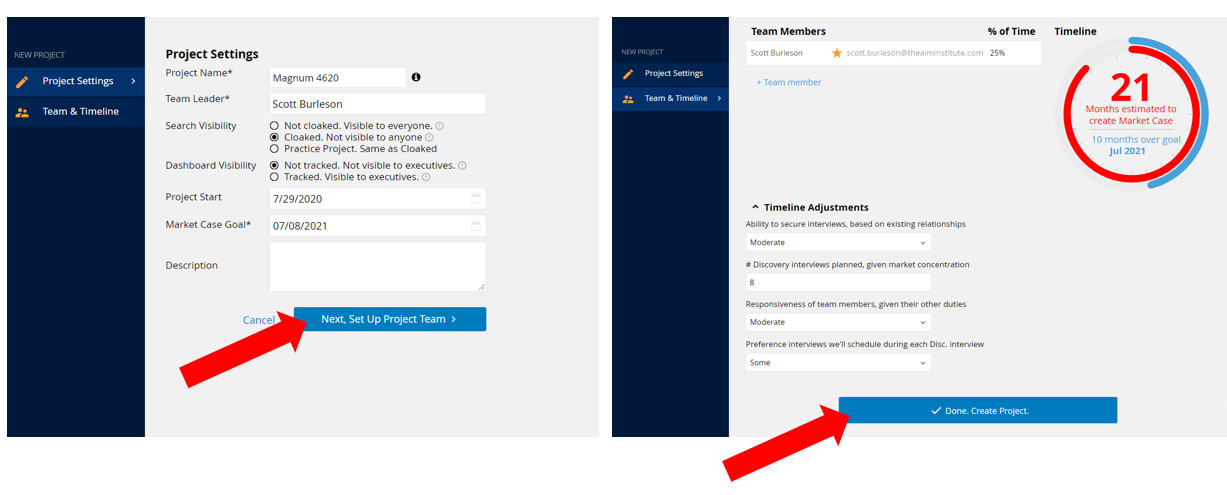
5. You have completed the minimum that must be done to create a project. To finish, just select "Next, Set Up Project Team" and then on the next page (Team & Timeline), select "Done. Create Project."
However, there are more fields to fill out which can be helpful for project management, data management, broadening the team or reporting. Continue with Steps 6-10 to add this additional information.
6. Additional Project Set-up Fields:
Search Visibility: If you select "Not cloaked," then data from your project will be visible to searches from your colleagues at your company. If it's particularly sensitive, you may want to select "Cloaked."
If just practicing, you can select "Practice Project", which also prevents the data from coming up in inter-company searches.
Dashboard Visibility: If set to "Tracked", then this project will show up on the Executive Dashboard for tracking purposes.
Project Start: The date to start the clock for project management.
Description: An overall project description. This will show up in the Executive Dashboard if tracked.
Remember, you can always change these fields later.
7. Great! You have completed the Project Settings. Let's move to set up your Project Team.
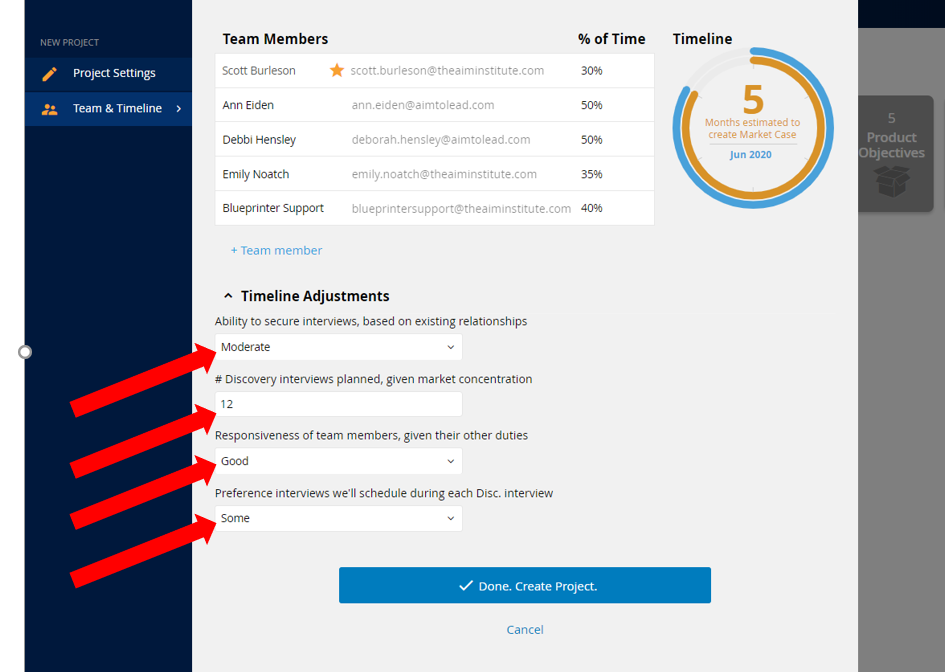
8. Add team members. You can only add Team Members with Blueprinter software subscriptions. Add their percent of time available to work on the Blueprinting project. Based upon the resources available, Blueprinter software will estimate the length of time to complete a project. Regardless of responses, the estimate will be a minimum of three months. However, some extremely focused teams can exceed that goal.
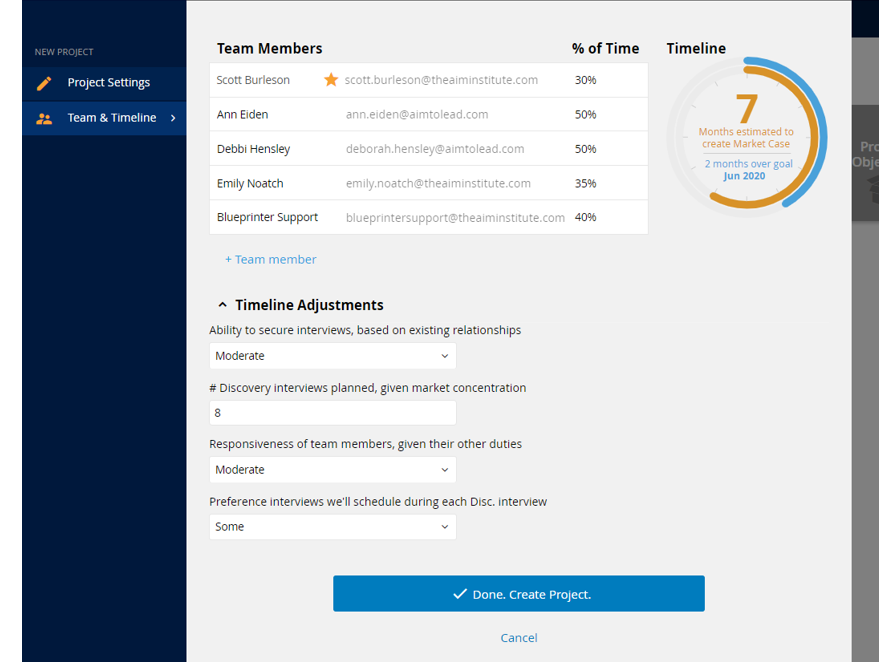
9. Select Timeline Adjustments. This will help to ensure that you have an accurate estimate on the amount of time to complete a Blueprinting project.
You will rate:
- Ability to secure interviews, based on existing relationships
- Responsiveness of team members
- The degree to which you will book Preference Interviews during each Discovery Interview
Finally, you will list the number of Discovery Interviews that your team plans to execute.
10. Congrats! You are finished with setting up your project! Make sure that your team members can all see it and access the new project. If they have any trouble, refer them to this article.
Keywords: New project, team members, get started